Create search views
To use ArangoSearch you first need to create views on your data, views can be considered as virtual collections.
Views are not updated synchronously as the source collections change in order to minimize the performance impact. They are eventually consistent, with a configurable consolidation policy.
The input values can be processed by so called Analyzers which can normalize strings, tokenize text into words and more, enabling different possibilities to search for values later on.
Search results can be sorted by their similarity ranking to return the best matches first using popular scoring algorithms (Okapi BM25, TF-IDF), user-defined relevance boosting and dynamic score calculation.
Creating a search view
We are going to use the point-of-interest collection to learn about search views
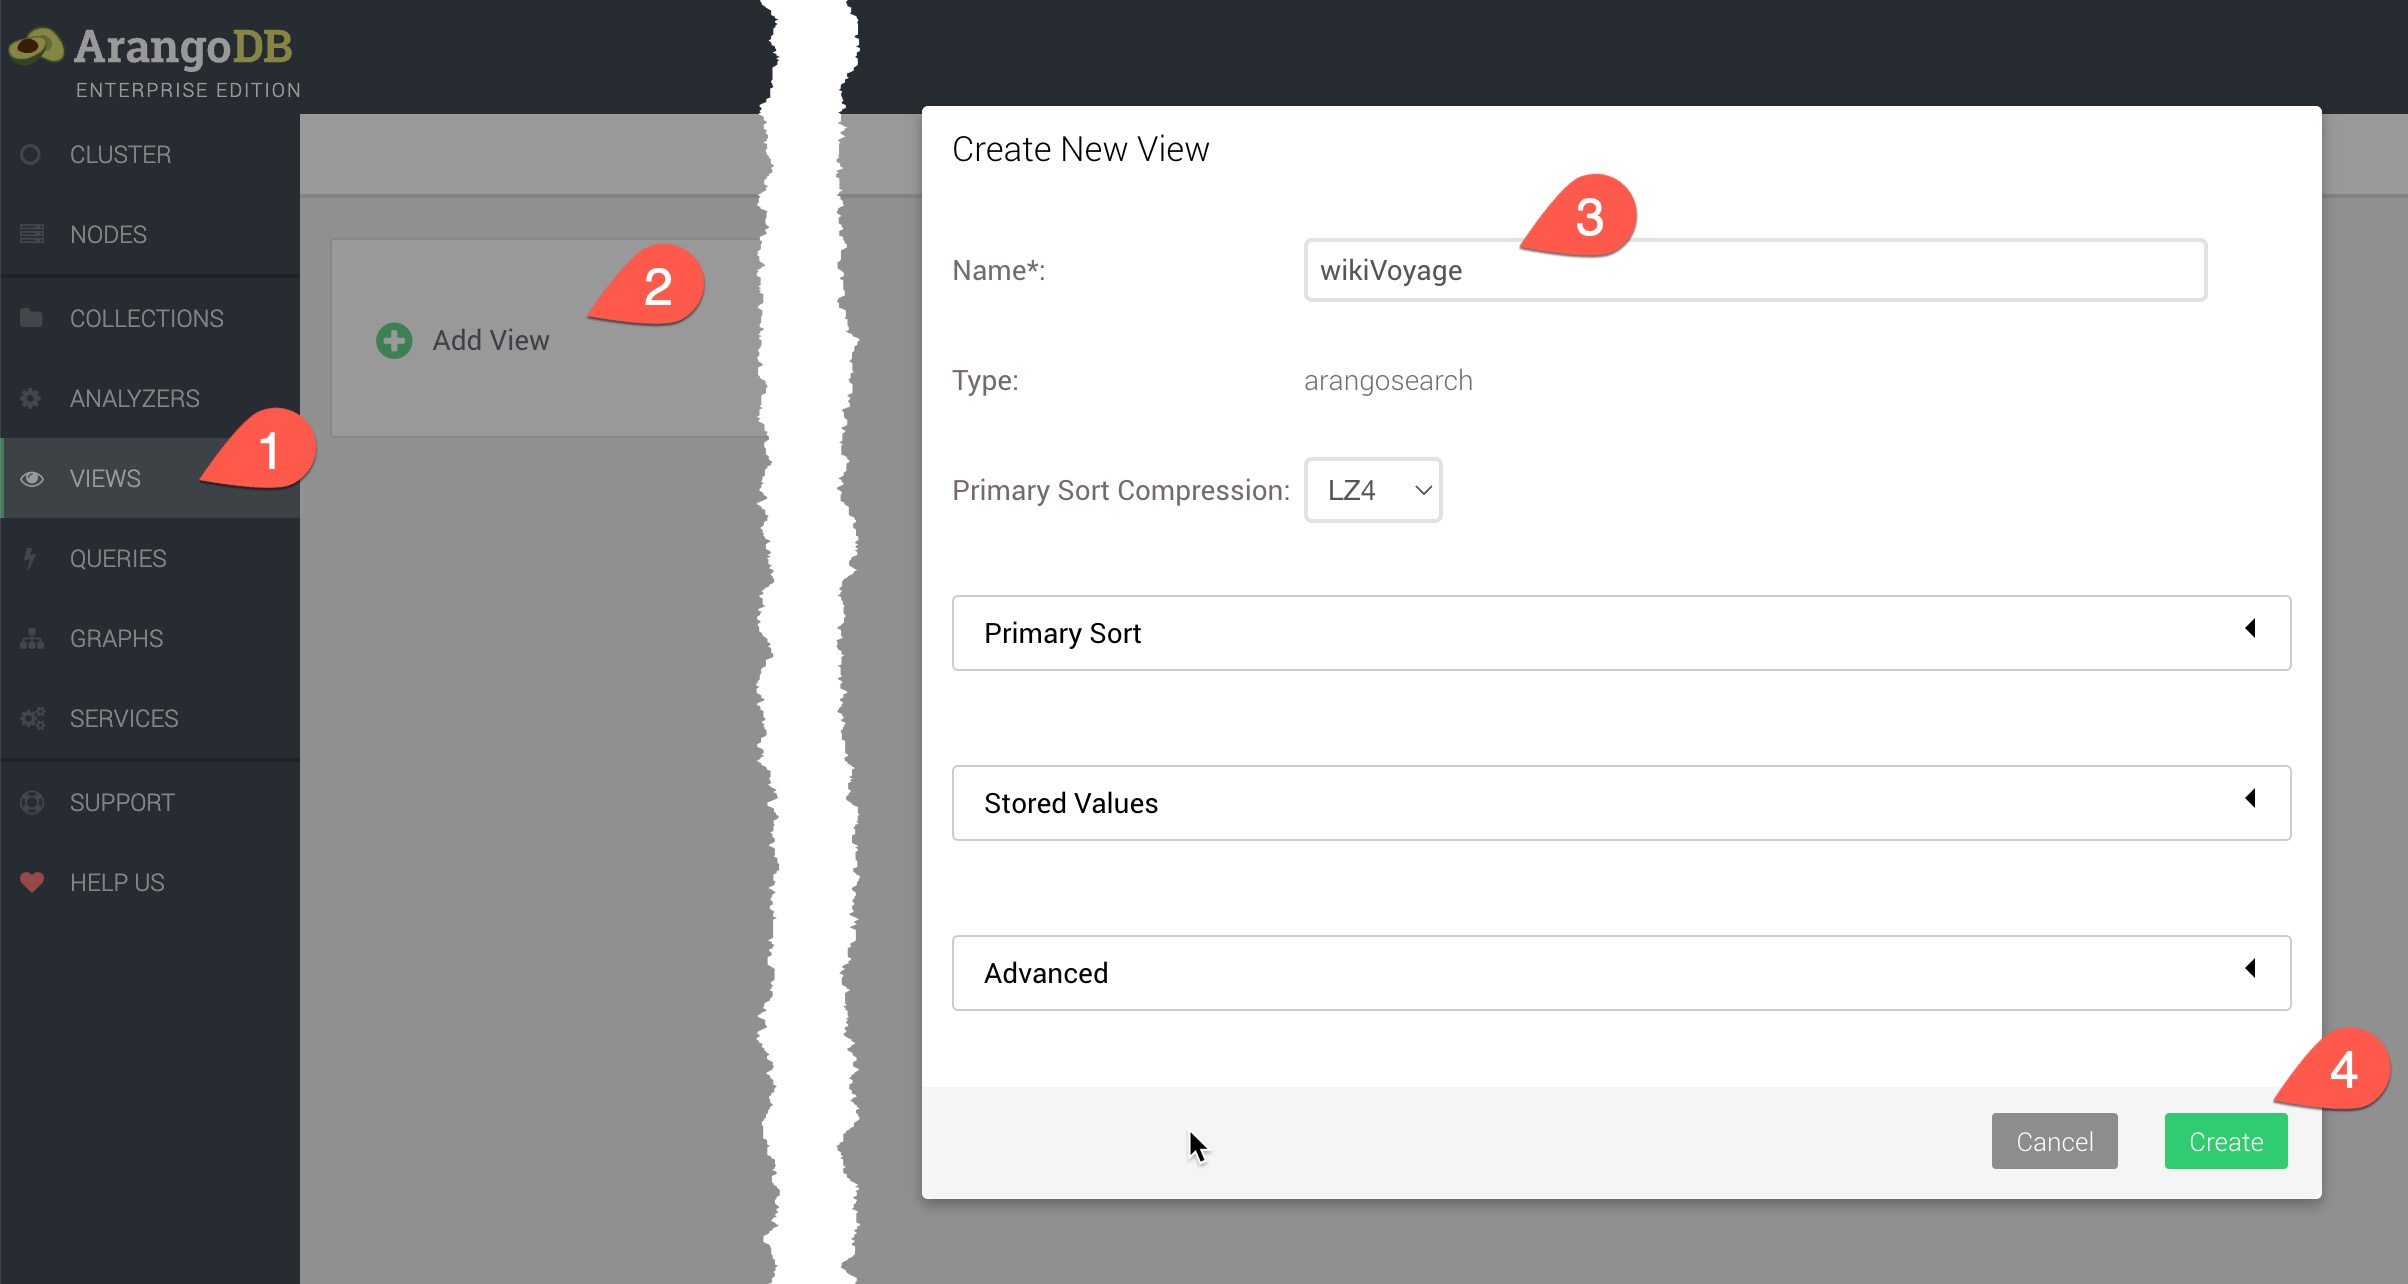
Follow the steps to create the wikiVoyage view
- (1) Click VIEWS
- (2) Click (+) Add View
- (3) Specify the name of the view as wikiVoyage
- (4) Click Create

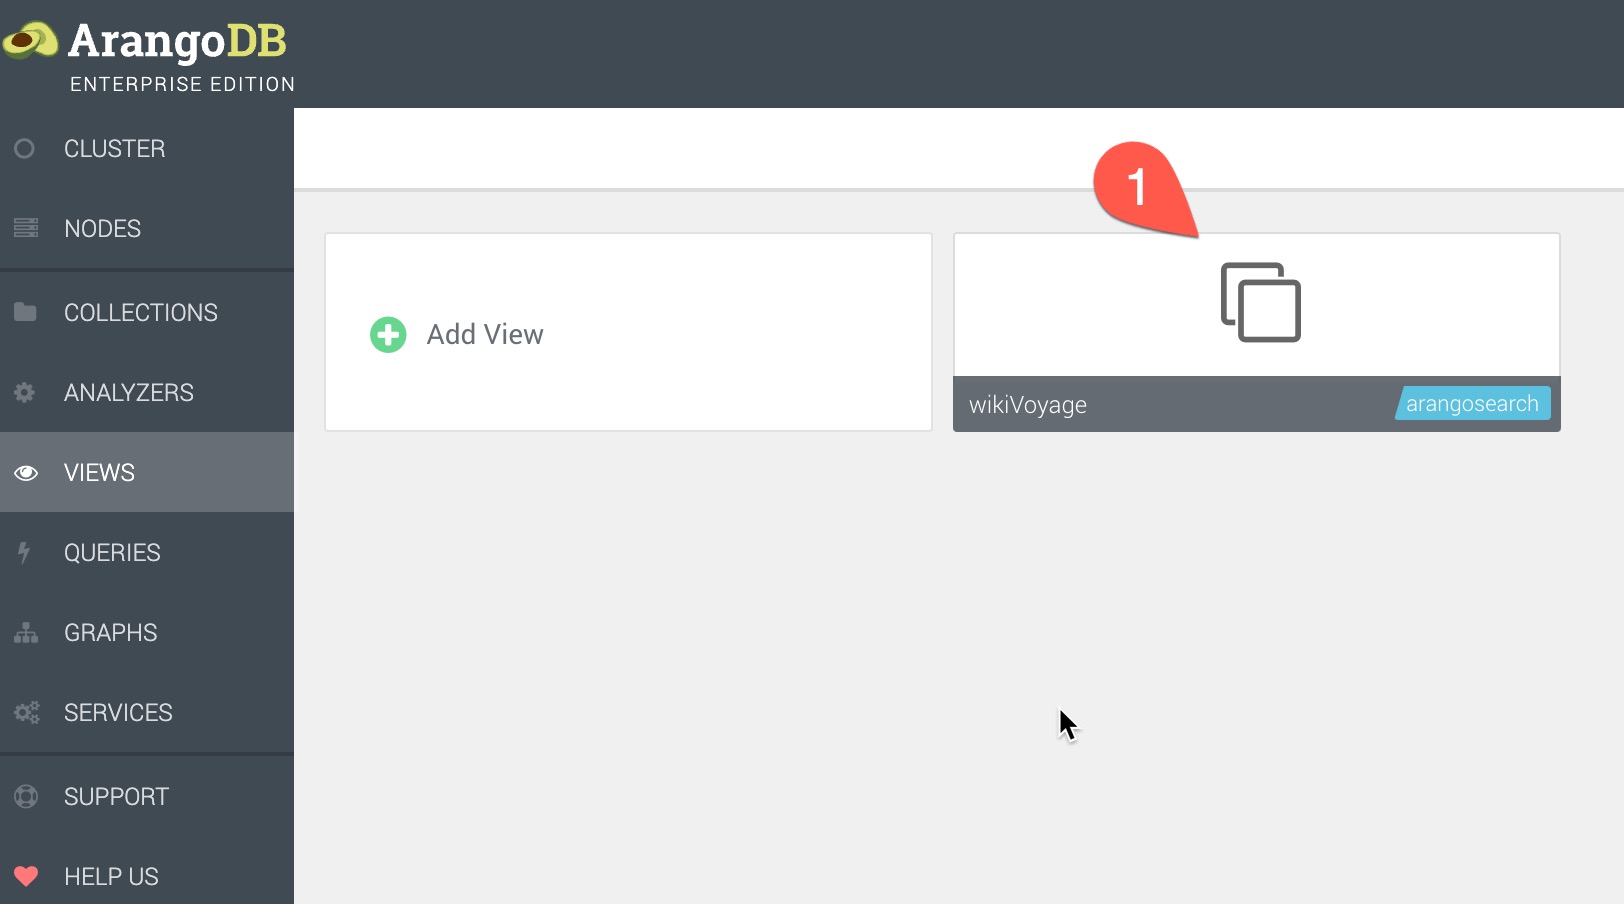
Next we need to edit the view to add some analyzers
- (1) Click the view name wikiVoyage to edit the view

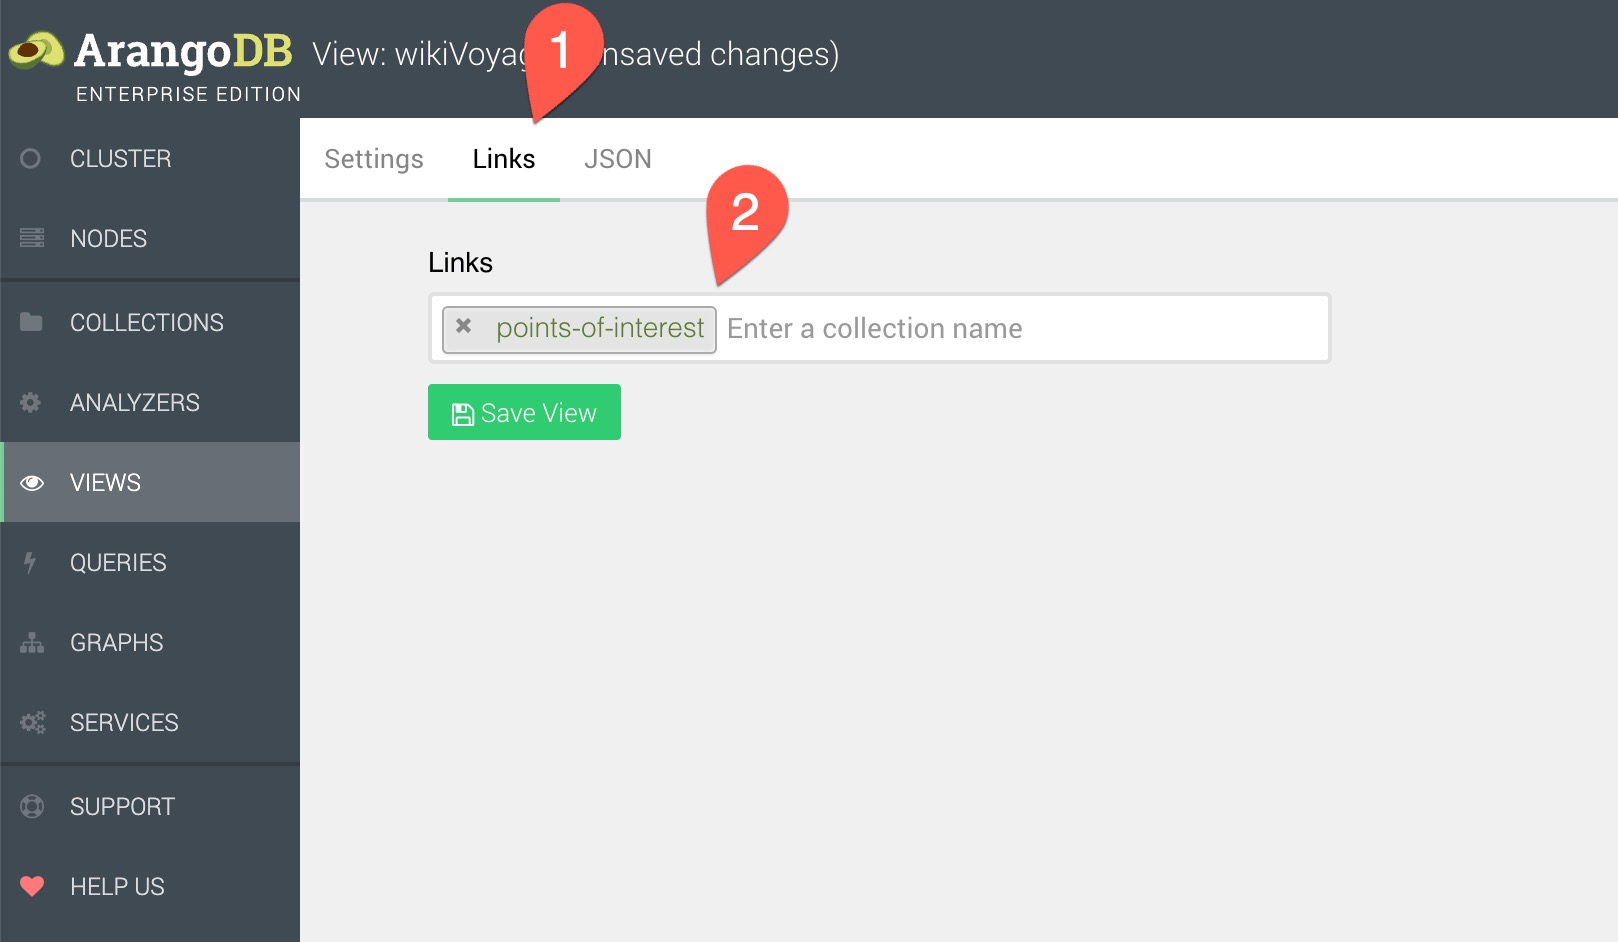
We then link the view to the points-of-interest collection
- (1) Click Links
- (2) Choose points-of-interest as the collection

The view is now ready for use in queries
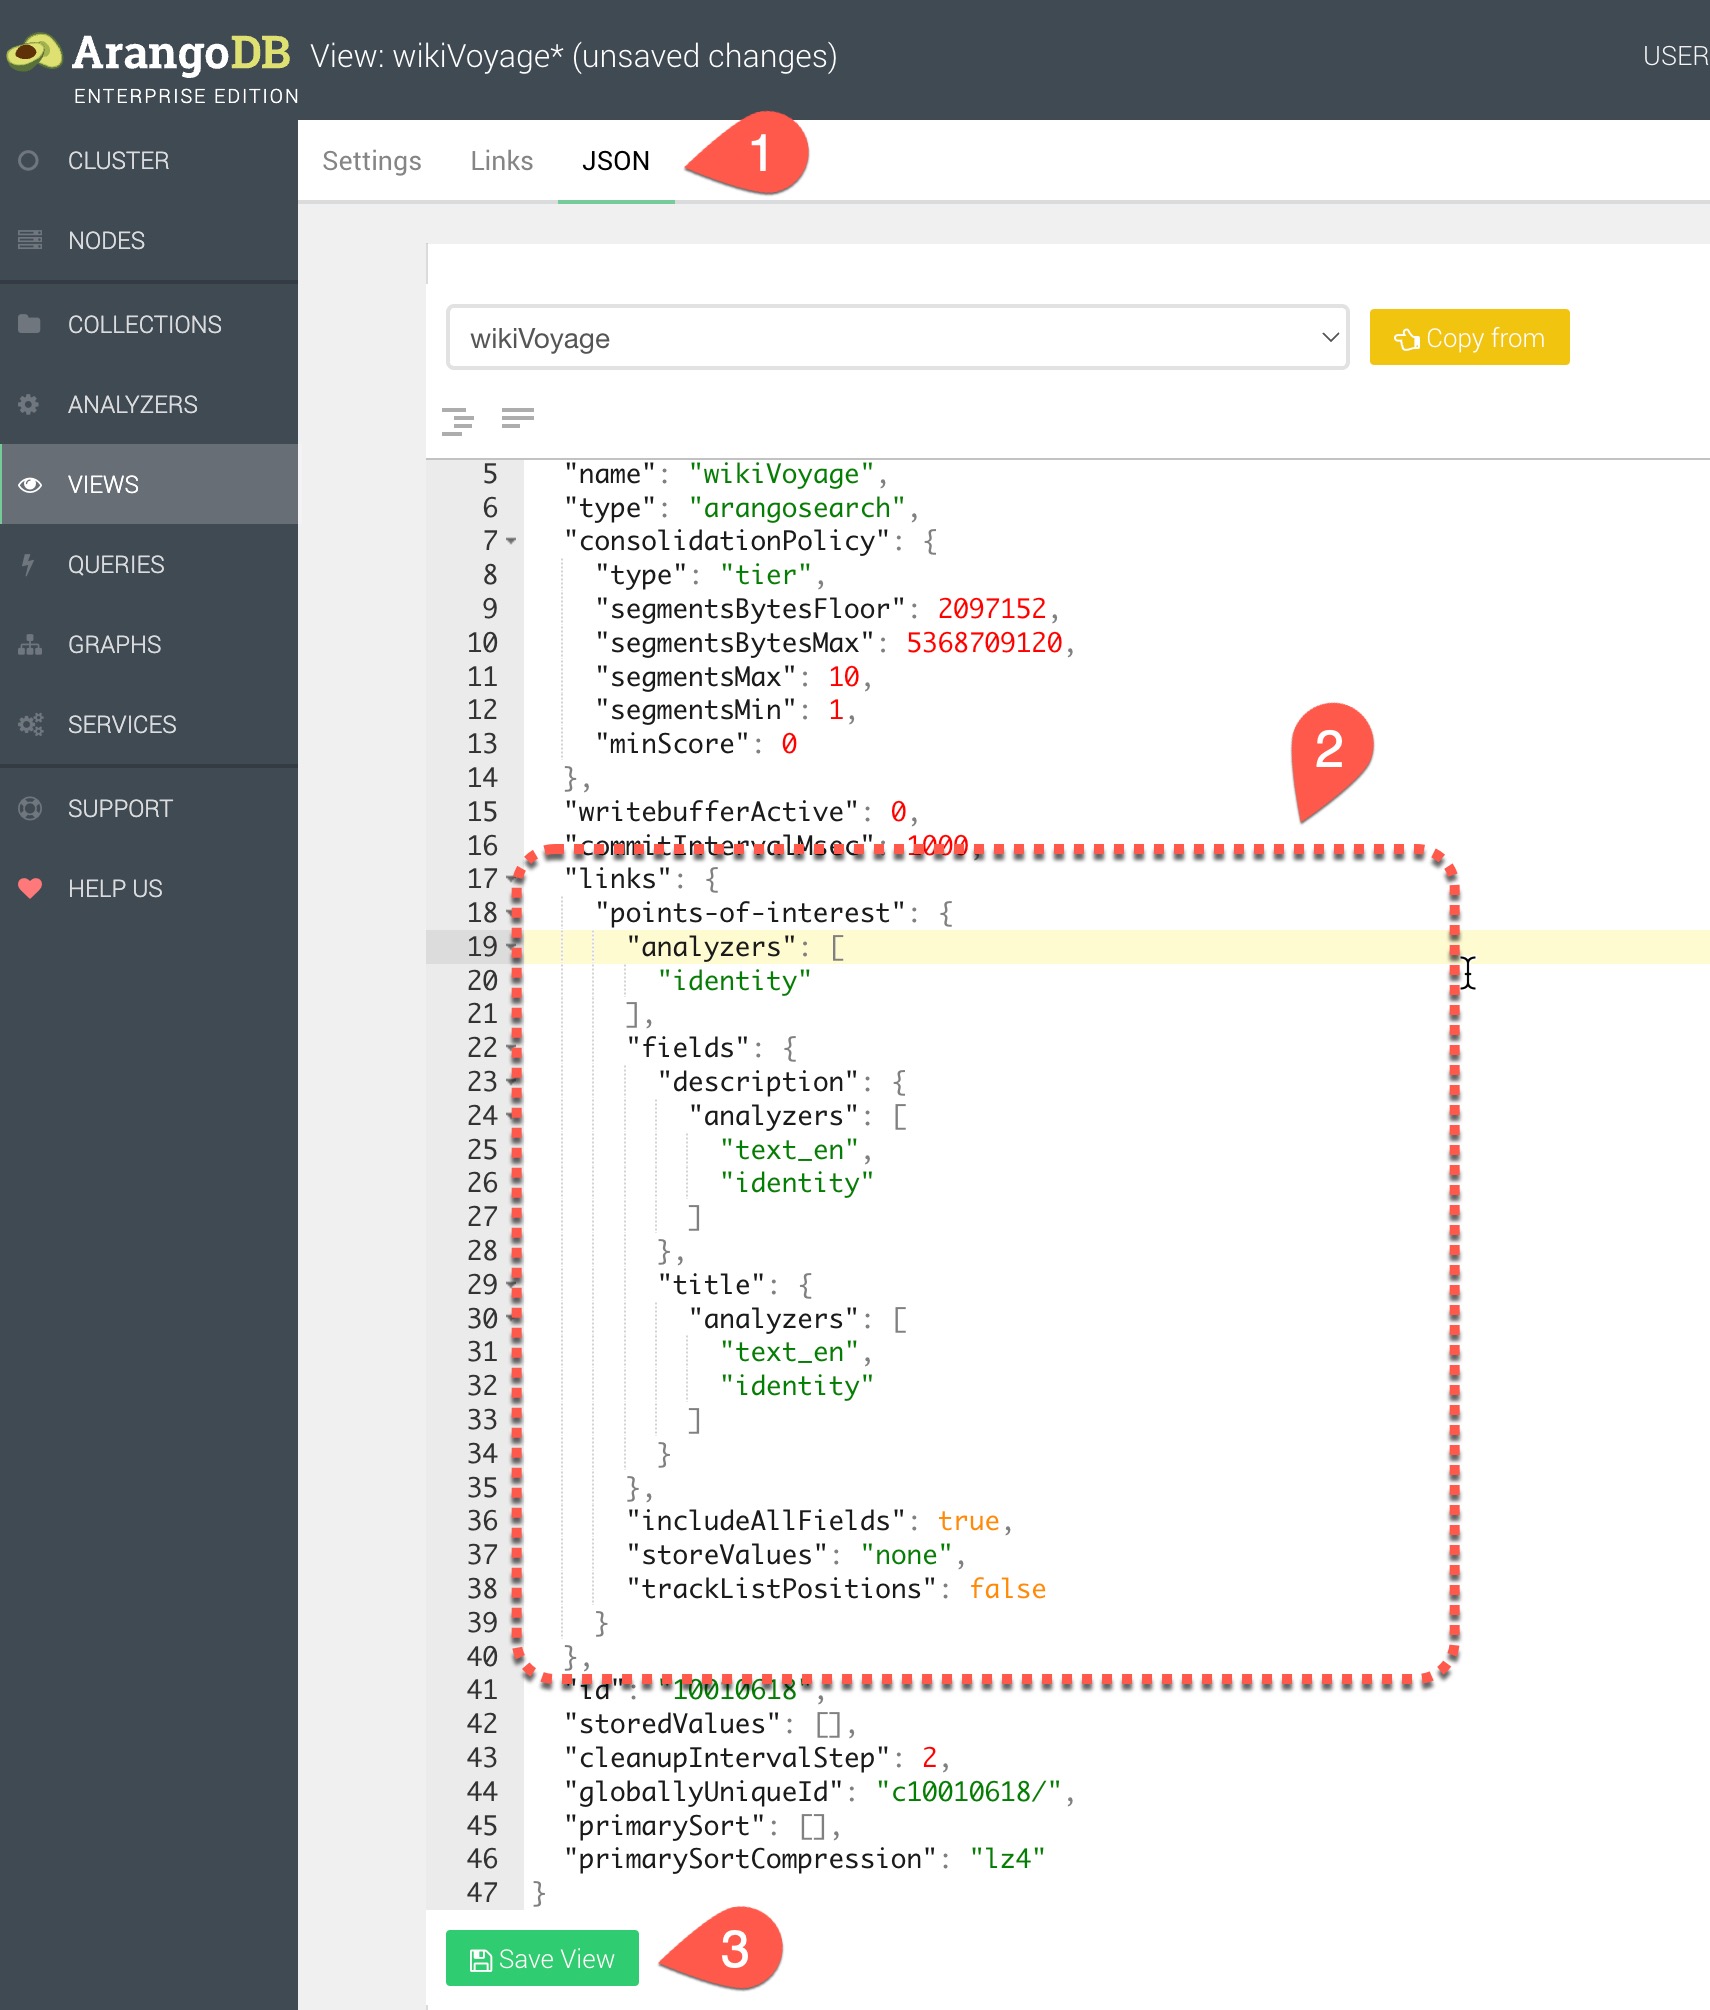
Lets configure the analyzers for the document and fields
- (1) Click JSON
- (2) Edits the links value of the JSON with the following content:
"links": {
    "points-of-interest": {
    "analyzers": [
        "identity"
    ],
    "fields": {
        "description": {
        "analyzers": [
            "text_en",
            "identity"
        ]
        },
        "title": {
        "analyzers": [
            "text_en",
            "identity"
        ]
        }
    },
    "includeAllFields": true,
    "storeValues": "none",
    "trackListPositions": false
    }
} - (3) Click Save View to save the view


The tutorials for this section are currently under construction. In the interim please use the provided references for your learning path
Anything unclear or buggy in this tutorial? Provide Feedback